When I think of a sweater I don't think of it as an accessory. More of a main dish... or main attraction... or Oh gosh, I don't know. I just know it's not an accessory.
News Alert: I've never claimed to have much knowledge on the subject of "fashion" so who am I to say?
News Alert: I've never claimed to have much knowledge on the subject of "fashion" so who am I to say?
Let me ask you this.... What happens when you have a pretty green sweater that you bought for $2.50 at Goodwill on Half Off Saturday (oooh yea!), you wore it once or twice, the next time you washed it, you forgot to "lay flat to dry" and instead put it in the dryer, and now it looks like the same sweater except it hits you at your natural waste [that's ABOVE the belly button, mind you] rather than at your hip where it should be?
Oh, well, you cut it up and make things out of it, that's what!
This morning I was surfing through Pinterest (once again) and found these treasures...
These are oddly comforting and pretty, too, but the link to what I thought would be a tutorial was just a page asking me to sign in. So I was bummed. But then I thought to myself "Self, you're smart. Figure this out."
I remembered my shrunken green sweater still hanging in my closet... yea, it's been a month since I shrunk it but I still have it in there. I grabbed the shrunken green sweater, and a blue wooden bracelet I never wear (I just had to be honest with myself), and I grabbed my sewing supplies and scissors and went to work.
I started with the following:
• my shrunken green sweater
• wooden bracelet
• thread
• needle
• pins
• pins
• scissors
Here's how to do what I did...
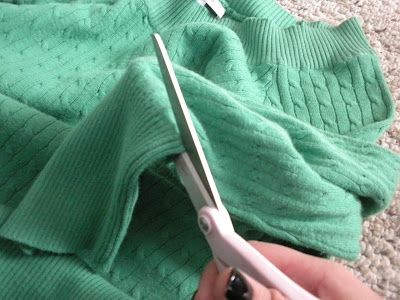
1. Cut the cuff of the sweater off. You won't need that part, you just need the cable knit part.
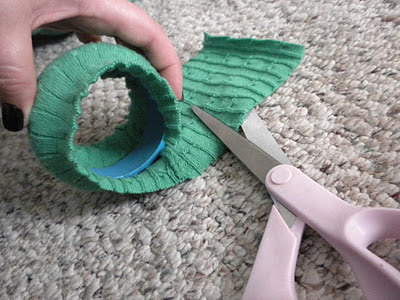
2. Determine how much of the sweater you will need by wrapping the sleeve around the bracelet and cutting the sleeve in that place. You will end up with a tube-shaped piece.
3. Cut the sweater (hereinafter referred to as "fabric") near the already existing seem, so you have one long strip of fabric.
4. Roll your bracelet down the middle of the fabric to determine how much of it you will need in order to wrap it completely. Since my sweater has quite a bit of stretch in it, I had to cut a couple inches off the end.
5. Join the ends of the fabric together and make a simple stitch. Be sure that the "outside" of the sweater is inside when doing this so when you flip it right side out, the seem you're stitching will be on the inside.
6. Wrap the fabric around the bracelet and using the pins, secure the fabric every inch or so.
7. Sew the fabric around the bracelet. Don't worry if the stitch isn't pretty. You won't see it at the end.
8. Rotate the seem to the inside of the bracelet and you're done!
VARIATIONS:
• Instead of the wooden bracelet, you could probably use any ring that fits around your fist and fits as a bracelet... like the plastic ring you get when you buy a scarf, or cheap bangles from the Dollar Tree (gosh, I love that place)
• Use a sewing machine instead of needle and thread for connecting the fabric in step 5
WAIT! THERE'S MORE....
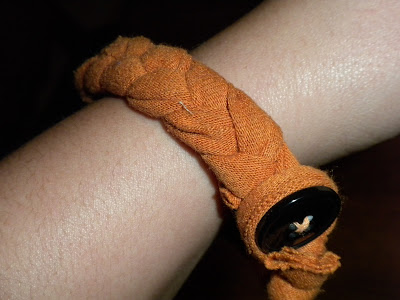
I got SEW drunk from cutting up my sweater that I decided to make a braided bracelet with it like I've also seen on Pinterest. I've done this before a few months ago using an old t-shirt and this is how that one turned out:
For the braided sweater bracelet, start by cutting a little more from the sleeve, then cut that part into three strips, and knot the end. For this one, it really wouldn't matter which part of the sweater you use, you just need about 3 strips about 1 inch wide by 10 inches long.
I used an oh-so-fancy way of securing the start of my braid for tension while braiding... (please ignore my ugly feet)
Secure the end again by making a knot.
Bring the ends together and stitch them in two places.
Double wrap it around your wrist, and it's that easy!
WAIT! There's more more! I even made a ring out of a little scrap. Just tied it around my finger and knotted it twice. It's cute, right?


No comments:
Post a Comment
Thank you for reading. I read every comment, so thank you for taking the time to leave one.