Thursday, April 18, 2013

Betty's Slow Cooker Lasagna.

Confession time.

I've decided I need to take some food photography lessons. Or maybe stop using my iPhone to attempt what I pray will be food blogger quality pictures. And also maybe put the food on a fancy plate, not a paper Dixie plate. Oh, and salad. Everything looks better next to a salad.


Whatever.

Regardless of my amateur food photos, Betty Crocker's Slow Cooker Lasagna was darn good. I made it  yesterday for my woman's card club (yes, I'm 28 and in a card club). I threw it all together in the morning and let it do its thing during the day.

For Betty Crocker's Slow Cooker Lasagna original instructions, click here. Or continue reading for a somewhat abbreviated version . . .

All you need is: 
• 1 pound bulk Italian sausage

• 1 medium onion, chopped (1/2 cup)

• 3 cans (15 ounces each) Italian-style tomato sauce

• 2 teaspoons dried basil leaves

• 1/2 teaspoon salt

• 2 cups shredded mozzarella cheese (8 ounces)

• 1 container (15 ounces) part-skim ricotta cheese

• 1 cup grated Parmesan cheese

• 15 uncooked lasagna noodles

Steps: 
1. Cook sausage and onion in a skillet sausage is no longer pink. Drain it. Stir in tomato sauce, basil and salt.

2. Combine 1 cup of the mozzarella cheese (1/2 the bag), the ricotta and the parmesan cheeses. (Refrigerate remaining mozzarella cheese while lasagna cooks.)

3. Put a fourth of the sausage mixture into a 6-quart slow cooker; top with 5 noodles, broken into pieces to fit. Spread with half of the cheese mixture and a fourth of the sausage mixture. Top with 5 noodles, remaining cheese mixture and a fourth of the sausage mixture. Top with remaining 5 noodles and remaining sausage mixture.

4. Cover and cook on Low heat setting 4 to 6 hours or until noodles are tender.

5. Sprinkle top of lasagna with remaining 1 cup mozzarella cheese. Cover and let stand about 10 minutes or until cheese is melted. Cut into pieces.

-------------------------------------

The overall response was great! I, personally, thought it sort of tasted like Spaghetti O's or any of the Chef Boyardee canned pastas. I'm not a fan of those. So, next time I will use Prego or some sort of spaghetti sauce, rather than the canned tomato sauce that it calls for.  But otherwise, it was EASY to make and delicious to eat!

Happy lasagna making [and eating]!

Tuesday, April 2, 2013

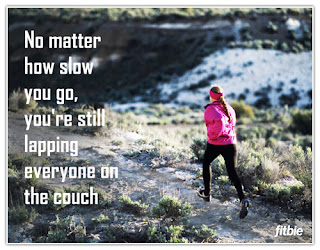
No matter how slow you go.


Image Source
I'll be honest . . .

Tonight I DID NOT want to run. It was cold, I am tired from not sleeping well last night, my calves are on FIRE and my body said "No, Angie, no!" But my heart knew those were just excuses, and I didn't have a legitimate reason not to get my butt outside and run. I've got a 5K next Saturday and really I should be further along in my training than I am right now.

Anyhoo... I did some burpees to warm up and I headed outside. I even said to Mike "I'm just going to go slow. I'm not really feeling it tonight." Usually I run the first mile and then walk a bit, run some more and walk, rinse and repeat . . . But once I got going, I felt God saying "Go, Angie, Go!" So I kept going, around my subdivision entrance, onto the school parking lot 1.5 miles away. I only stopped twice. Once to tie my shoe that had come undone and once to let the 18 wheeler pass before I crossed the highway. I figure that was pretty smart.

It was hard and my calves were still on fire most the time, but I used that time to talk with God. I don't take care of this body the best I can. I don't use self-control. I often give into my urges and have the hardest time telling myself "No." I'm reminded that this is something I will continually need to work on.

So, back to my run tonight! I know some of you might be crazy fast runners, but I'm not and I just have to celebrate that tonight I ran my fastest 3 miles ever . . . 35:41!

When I got back, Mike asked how I did and I just showed him my phone and he gave me a big high five. 

It felt good. And I'm so glad I listened to that voice in my head telling me to push myself. And no, I don't have a picture of me all sweaty and gross to show you . . . nobody wants to really see that.

Happy Running!


Monday, April 1, 2013

Best, easiest tastiest Mac and Cheese ever.

Are you ready for this? It's the BEST - EASIEST - TASTIEST Mac & Cheese recipe ever for homemade macaroni and cheese. And not only is it easy, it's delicious!


Really! All you need are:

• 2 cups of pasta (we use shells)
• 2 cups cheddar cheese (so a package of it from the store)
• 2 cups milk
[you'll also want to add salt & pepper to taste]

THAT'S IT!

Here's a more detailed list of how to make it. . .

1. Combine 2 cups of pasta with 2 cups milk.


2. Simmer until noodles are cooked to your preference STIRRING OFTEN!


3. Do not drain the pasta! Add in 2 cups of cheddar cheese (and salt and pepper) to the pasta and milk mixture, and stir until it's all melted. 


See how easy that was???? And it's sooo tasty and creamy! You could, of course, use different kinds of cheese and pastas, but the recipe bones are simple. It's really creamy because you cook the pasta in the milk. 

Mike loves it.

I love it.
 

It's a crowd favorite. Go on, try it tonight! 

** UPDATE **
We recently tried mixing in some mozzarella cheese to the cheddar mix and it didn't turn out so well. It's much too soft and just doesn't MELT like cheddar does. I don't know the science behind it, but I will recommend not using it unless you're okay with clumpy mozzarella cheese. And if you are, then go for it! :)


Happy cheesing! 

Coffee artwork.

This coffee artwork project is one that has been years in the making. . . 


I purchased this gigantic mural from a garage sale at our hospital about 4 years ago. It cost me a whoppin' $5. No joke. And I kept it in my mom's garage until about a month ago. I knew I'd have a dining room wall someday that I could hang it on and what do ya know. . . I do now!


Considering the size of this mural, I knew it had to be either trimmed down or broken up somehow. My grandpa was a major help in this process. He trimmed the metal frame off of the mural for me. Then last weekend Mike and I dropped by and we made the BIG cuts. Yes, I cut this board into threes!


It took a few tries with the jig saw and then finally with the table saw, but it got done! We cut it into three 24" wide pieces.


The next step was to get it onto our wall! I purchased some mirror hanging hardware at ACE and measured out my wall.


One by one I hung them up.


I'm SO SO SO happy with the final project! Especially because I've had this vision in my head for so long. It's rewarding to finally see it done and hanging!


It continues my theme in the kitchen of cafe style. Next to the mural I have a faux coffee bean grinder hanging by the patio door.


And by the back door I have a coffee cup shaped chalkboard hanging with my shelf. I purchased this chalkboard and the vinyl clings for the wall at a craft bazaar in December. . . just $10!


And above our pantry I have a cool tin sign.


I love seeing some design elements come together in our new home. Getting settled and making this "ours" has been so fun!


Happy Decorating!

Organize a makeup drawer.

Since we moved into our new house, we've been overwhelmed by the amount of storage we have! To most people it's probably the normal amount of storage, but coming from a 125 year old house with only 2 closets to a brand new house with 5 closets and 1,000 drawers. . . we're in Heaven.

In our master bathroom, I have my OWN DRAWER just for my makeup. Until I organized it, things were sliding all over the place.


I had an old silverware organizer in a "garage sale" box that I found and decided to use. It was actually too wide for my drawer.


So I cut it with scissors and made it fit!


Much better!


It's so refreshing to see my makeup organized and where it should be. No more searching for eye liner pencils in the back of the drawer.

Happy organizing!